| |

The following guide demonstrates how to create, edit and move entries in your YouDeparted account.
Creating entries
- Selecting a Category
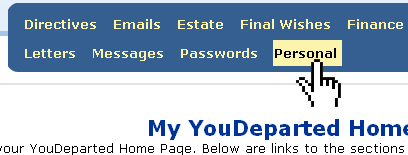
Lets go through the process of making an entry in one of the sections. Lets start with Personal. Select Personal as shown in the picture below.
- The Category Entries Screen
Once you click on the Personal category, you will now see the following screen:

- Creating an Entry
Now we will make an actual entry for our Family Members. Click on Add New on the Family Members section. You will be taken to a screen where you can enter information. Notice there is already some information filled below - this is a Template used to help enter the appropriate information.
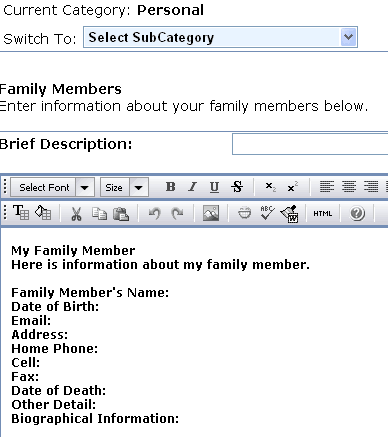
These templates help you organize your information. For example, any time you add a new Family Member, you will see the same screen below. If you want to use the template, go ahead and make entries by each line item. Or you can simply delete the template information and add the entry as you like. See the examples below.
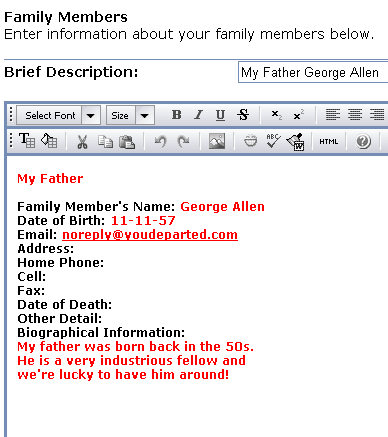
- Working With the Template
Here we have used the template and simply added our own information:
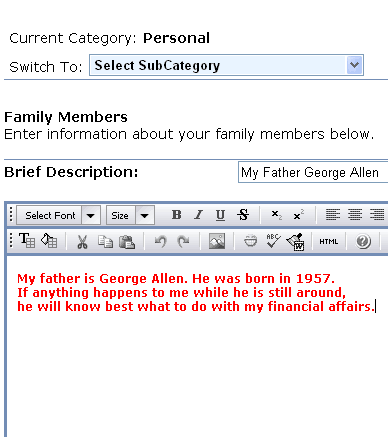
- Use, Modify or Delete the Template
You also have the option of erasing the template and filling in just what you want:
All of your entries are made in a similar way: they start with a template which you have the option of using, modifying, or simply entering your own text as shown above.
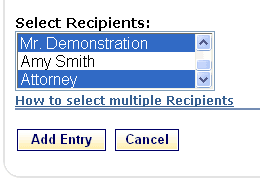
- Add Recipients
The Recipients you add to an entry are the ones that will be able to view that entry when your account is unlocked. You can add from zero to all of your Recipients to an entry. Below, we added the Recipients "Mr. Demonstration" and "Attorney."
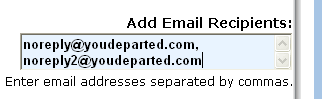
- Add Email Recipients
You can have copies of an entry sent by email. You should use this feature if there is someone you want to send information to after you pass away, but do not want to add as an official Recipient to your account. Below we add two email addresses, separated by a comma:
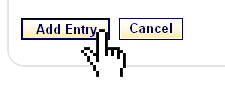
- Saving the Entry
Once you have finished working on the entry and selected Recipients, simply click the Add Entry button.
You can always come back and edit the entry later.
Editing Entries
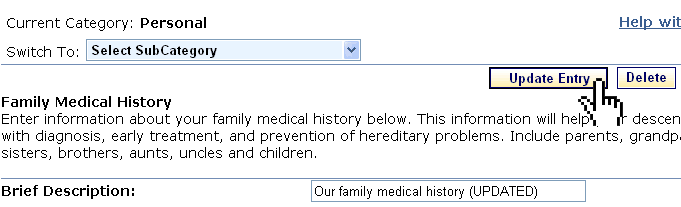
- Next to an entry, simply click the Edit button.

- Make your changes, then click the Update Entry button and the entry will be saved.
Moving Entries
- Next to an entry, click the Move button and a popup will be generated where you can move the entry.
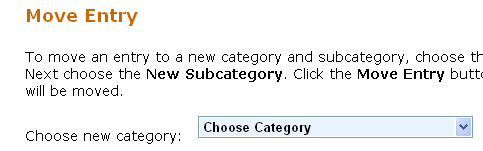
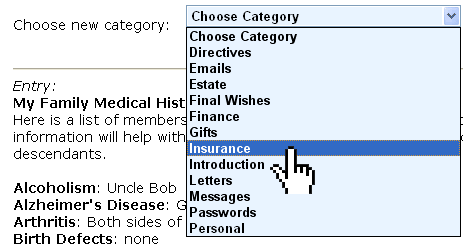
- Select a new category.
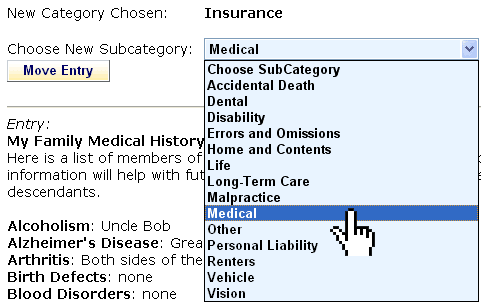
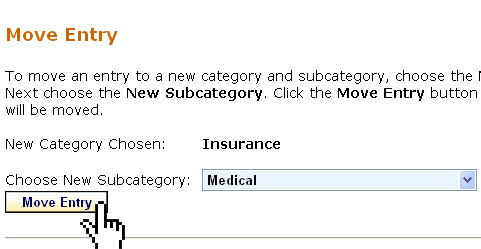
- Select a New Subcategory.
- Click Move and the entry will be moved to the new location!
|
|
|