|
After you pass away, your account is unlocked by your Recipients and the entries you created are sent out to them along with emails and letters. In order to unlock this information, the Recipients you added to your account must log into their Recipient Management Center and start the unlocking process.
Note: We recommend trying this process yourself so you will better understand how it works. Try the Demo, or sign in as your own Recipients.
The following steps detail how the process works:
Review the steps below then follow this link for a few examples.
1. Add Recipients You add Recipients to your account and send them their login details. More info on adding Recipients here. In order for your account to be unlocked, you must have at least one Recipient. We recommend at least three, and in some family situations, it may be advisable to have a professional such as an attorney be one of your Recipients to protect your account from early unlocking.
2. Create Entries You create entries and specify who shall receive them when you pass away. More info on creating entries here.
3. When You Pass Away
When you pass away, your Recipients login to their Recipient Management Center.
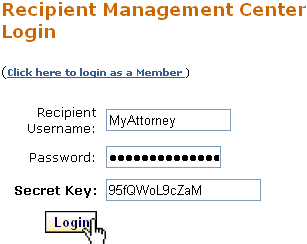
4. Starting the Unlock Process
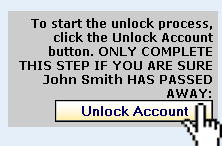
In the Recipient Management Center, they click the Unlock button.
5. Three Possible Outcomes
- Not enough Recipients have tried to Unlock the account.
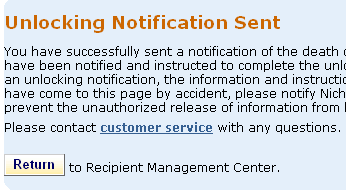
YouDeparted members specify how many Recipients it takes to unlock their account. Until this number is reached, Recipients who try to unlock the account will simply get a message telling them that they have sent a notification of the death of the account holder to the other Recipients. They will not yet be able to see any of the entries created for them.
Note: If one of your Recipients completes this action at the wrong time (you are still alive) you must Relock your account.
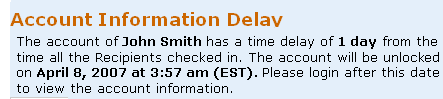
- Enough Recipients have completed the process, but there is a time delay.
A YouDeparted member has the option to set a time delay on the unlocking of their account. If set, when the minimum number of Recipients needed to unlock has been reached, the time delay will immediately start ticking down and the account will be unlocked after the specified amount of time.
- The Account is Unlocked!
If no time delay was set and the minimum number of Recipients is achieved, the account will be unlocked.
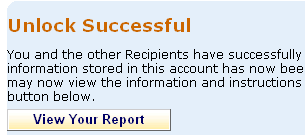
6. Releasing Your Information Once your account is unlocked, your Recipients will be able to retrieve the entries you made for them, and the letters and emails you created will be sent out.
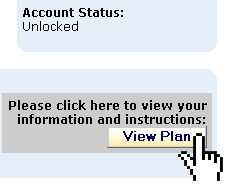
- Viewing The Plan
When the account is unlocked and your Recipients login to their Management Center, there will be a button named View Plan which they can click to see the entries you created for them.
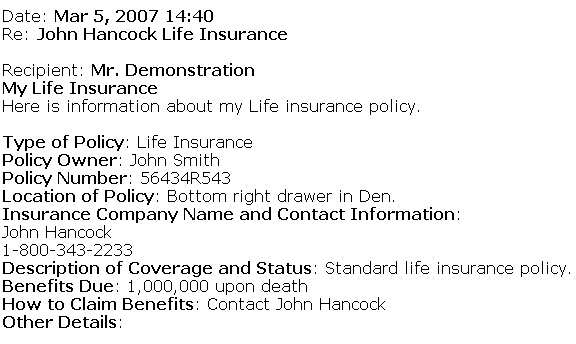
- What They Will See
Your Recipients will now be able to see the information and instructions you left them. The following example is just one of many possible entries.
| 